
MCP Server for AI Assistants
A Claude Code session analyzing an embedded system with 3 FPGA’s communicating with each other and a USB host using the Active-Pro App with MCP Server
MCP Server for AI Assistants
The Active-Pro MCP Server lets AI assistants, including Claude, control the Active-Pro application directly. Once connected, you can ask the AI to start captures, configure triggers, search decoded data, export AI Snapshots, control outputs, navigate between recorded triggers, and run complete test sequences in plain English.
The server is a small Python script that sits between the AI assistant and the existing Automation API on port 37800. No changes to the Active-Pro application are required.
Download: active_pro_mcp.zip
The zip contains two files:
server.py- the MCP serverrequirements.txt- the single Python dependency
What Is MCP?
MCP stands for Model Context Protocol - an open standard developed by Anthropic that lets AI assistants connect to external tools and services. Think of it as a plug-in system for AI: instead of just answering questions from memory, the AI can reach out to real applications and control them.
When you set up the Active-Pro MCP server, Claude gains a set of tools it can call, start_capture, search, export_ai_snapshot, set_trigger_mode, next_trigger, and others. When you ask Claude to "run a 10-second capture, trigger on the word FAULT, then walk me through every match," it doesn't generate instructions for you to follow manually; it actually calls those tools itself and reports back what it found.
You need Claude Desktop to use MCP servers. Claude Desktop is Anthropic's native application for Windows and Mac. The browser version of Claude at claude.ai does not support local MCP servers. Claude Desktop is free to download and includes the same AI as the web version.
Overview of the Setup Process
There are five things to do, in order:
- Install Claude Desktop
- Install Python
- Install the MCP Python package
- Extract the Active-Pro MCP server files
- Tell Claude Desktop where to find the server
Total time: about 10-15 minutes.
Step 1, Install Claude Desktop
If you already have Claude Desktop installed and signed in, skip to Step 2.
- Go to claude.com/download
- Click Download for Windows (or the macOS version if you are on a Mac)
- Run the installer and follow the prompts, accept the defaults
- Launch Claude Desktop from the Start menu
- Sign in with your Anthropic account (the same account you use at claude.ai, or create a free one if you don't have one yet)
Important: Always download Claude Desktop directly from claude.com/download. Do not use third-party download sites or the Microsoft Store version, they may not support MCP.
You can confirm Claude Desktop is working by opening it and having a quick conversation. It works exactly like the web version.
Step 2, Install Python
The MCP server is a Python script, so Python must be installed on your PC. This is a different Python than the one bundled inside the Active-Pro application, the bundled interpreter is used only to run Custom Decoders inside the app, and is not available to Claude Desktop.
- Go to python.org/downloads
- Click the large Download Python button, you want version 3.10 or above (the site shows the current latest, which is fine)
- Run the installer
- On the very first screen of the installer, check the box that says "Add Python to PATH" - this is the most common mistake people make. If you miss it, Python installs but won't be usable from the command line.
To confirm Python installed correctly: Open a Command Prompt (press the Windows key, type
cmd, press Enter) and type:python --versionYou should see a response like
Python 3.12.3. If you see an error like'python' is not recognized as an internal or external command, Python is not on your PATH, uninstall it and reinstall with the "Add Python to PATH" checkbox checked.
Step 3, Install the MCP Package
The server needs one Python package. Install it with a single command.
- Open Command Prompt or PowerShell (press the Windows key, type
cmd, press Enter) - Type the following exactly and press Enter:
pip install mcpYou will see progress output as it downloads and installs. When it finishes and returns you to a prompt (>), it is done. The whole thing takes about 10-30 seconds depending on your connection.
If you see "pip is not recognized": Try this alternative command instead:
python -m pip install mcpIf that also fails, Python's PATH setup did not complete, reinstall Python with the "Add to PATH" box checked.
If you see a permissions error on Windows: Close the Command Prompt, then right-click Command Prompt in the Start menu and choose Run as administrator. Try the
pip install mcpcommand again.
Step 4, Extract the MCP Server Files
- Download active_pro_mcp.zip from the link above
- Extract (unzip) the contents to a permanent location on your PC, somewhere you won't accidentally move or delete. A good path is:
C:\ActivePro\mcp\After extracting, confirm these two files exist at that location:
C:\ActivePro\mcp\server.py
C:\ActivePro\mcp\requirements.txt
Leave these files in place permanently. Claude Desktop launches
server.pyas a background process each time it starts. If you move the file later, Claude Desktop will fail silently and the hammer icon won't appear. If you ever move the files, update the configuration path described in Step 5.
Step 5, Configure Claude Desktop
Claude Desktop reads a JSON configuration file to find out which MCP servers to connect to. You need to add an entry for the Active-Pro server.
Finding the Configuration File
The configuration file lives at:
%APPDATA%\Claude\claude_desktop_config.jsonThe quickest way to get there:
- Press Windows key + R to open the Run dialog
- Type
%APPDATA%\Claudeand press Enter - Windows Explorer opens the Claude application data folder
Look for a file called claude_desktop_config.json.
If the file does not exist yet: That is normal for a fresh installation. Create it: right-click in the Explorer window, choose New > Text Document, and name it claude_desktop_config.json. Make sure the file name ends in .json and not .json.txt.
Tip: If you cannot see file extensions in Windows Explorer, click the View tab in Explorer's ribbon and check File name extensions.
Alternatively, you can open the config directly from within Claude Desktop: go to Settings (gear icon) > Developer > Edit Config.
Writing the Configuration
Open claude_desktop_config.json in any text editor, Notepad works fine. The complete file contents should look exactly like this:
{
    "mcpServers": {
    "active-pro": {
    "command": "python",
    "args": [
    "C:\\ActivePro\\mcp\\server.py"
    ]
    }
    }
}
Critical details:
- Use double backslashes (
\\) in the Windows path. A single backslash is a special character in JSON and will cause a silent failure. - The file must be valid JSON. The most common mistakes are: a missing comma between entries, a trailing comma after the last entry, mismatched braces, or an unclosed quote.
If you already have other MCP servers listed in the file, don't replace the whole file, add the "active-pro" entry inside the existing "mcpServers" block:
{
    "mcpServers": {
    "some-other-server": {
    "command": "node",
    "args": ["C:\\path\\to\\other\\server.js"]
    },
    "active-pro": {
    "command": "python",
    "args": [
    "C:\\ActivePro\\mcp\\server.py"
    ]
    }
    }
}
Save the file.
Step 6, Restart Claude Desktop and Verify
Fully quit Claude Desktop - this is important. Simply closing the window often leaves Claude running in the background (you can see it in the system tray at the bottom-right of the taskbar). To actually quit:
- Right-click the Claude icon in the system tray and choose Quit, or
- Go to File > Exit in the Claude Desktop menu bar
Then relaunch Claude Desktop from the Start menu and open a new conversation.
Look for the hammer icon (🔨) in the bottom-left of the chat input bar. This icon means Claude has MCP tools available. If it is there, setup is complete.
Click the hammer icon to expand the tool list. You should see the Active-Pro tools, start_capture, stop_capture, search, the trigger tools, and the rest. If they are listed, everything is working.
If the hammer icon does not appear, see the Troubleshooting section at the bottom of this page.
Step 7, Your First Commands
Before asking Claude to control the Active-Pro:
- Make sure the Active-Pro application is open and running (version 3.8 or above, 6.x recommended for trigger commands)
- Connect your hardware device if you plan to take captures
Start with a simple verification:
"Are you connected to the Active-Pro? Is a device plugged in?"
Claude will call the is_connected tool and report back. If it says yes, you are ready to go. If it says no, check that the Active-Pro application is running.
Example Prompts to Try
Basic capture:
"Start a 5-second capture, wait for it to finish, then tell me how many bytes were captured."
Search for problems:
"Run a 10-second capture. When it's done, search for any message containing ERROR. If you find one, tell me the timestamp and save the capture to C:/captures/debug.active."
Triggered capture:
"Configure a trigger that fires when Device A text contains FAULT, with 2 seconds of pre-trigger context. Stop after 5 triggers. Start the capture and walk me through each captured fault."
Stimulus and capture:
"Set A1 to a ramp waveform from 0 to 3.3V, capture for 3 seconds, then zoom to show all captured data and save a screenshot to C:/docs/ramp_test.png."
Full AI analysis loop:
"Start a 5-second capture. When it finishes, export an AI Snapshot for the full time range to C:/temp/snap.aft. Open that file and tell me what you observe about the firmware output."
Automated pass/fail test:
"Run a 10-second capture. If the word ERROR appears anywhere in the decoded output, save the capture to C:/failures/ with today's date in the filename and explain what happened. Otherwise just report pass."
Behind the scenes, Claude is calling the same Automation API commands described in the Automation API chapter, it just decides which commands to call, in what order, based on your instructions.
Multiple Active-Pro Instances
When more than one Active-Pro instance is running simultaneously, each uses a different port (37800, 37801, 37802, ...). Every MCP tool accepts an optional device parameter (1-8, default 1) that selects which instance to target.
Example: "Start a capture on device 2" tells Claude to target the instance listening on port 37801.
Available Tools
The MCP server exposes the Automation API as individual typed tools. The 96 tools below cover capture control, signal reading, output control, trigger configuration and navigation, buffer settings, file operations, view control, and notes / analysis context.
For anything that does not have a dedicated tool, use send_raw_command to pass a raw API command string. See the Automation API chapter for the full raw command set.
Connection and status
| Tool | Purpose | |
|---|---|---|
hello |
Liveness check. | |
is_connected |
Returns YES/NO. | |
is_capturing |
Returns YES/NO. | |
get_devices_attached |
Returns USB serial numbers of attached pods. | |
select_device |
Switch the active pod by index. |
Capture control
| Tool | Purpose | |
|---|---|---|
start_capture |
Begin a capture. | |
stop_capture |
Stop and complete post-processing. | |
new_capture |
Clear the current capture buffer. | |
get_capture_size |
Current capture size (bytes). | |
get_capture_time |
Capture duration in seconds. |
Signal reading (requires active capture)
| Tool | Purpose | |
|---|---|---|
get_logic |
8-bit bitmask of D0-D7. | |
get_analog |
Voltage on analog channel 1-6 (4-6 are Ultra-only). |
Analog channel settings (read-only)
| Tool | Purpose | |
|---|---|---|
get_channel_offset |
Per-channel offset (channel 1-8). | |
get_channel_scale |
Per-channel scale multiplier. | |
get_channel_units |
Per-channel units label. | |
get_current_resistor |
Current-measuring resistor value in ohms. | |
get_battery_capacity |
Battery capacity in mAh. | |
get_analog_range |
0_20 or MINUS10_PLUS10. |
|
get_analog_sample_rate |
Configured analog sample rate (samples/sec). |
Digital output control
| Tool | Purpose | |
|---|---|---|
set_digital_output_mode |
D0/D1 output mode (tri-state, low, high, PWM). | |
set_digital_pwm |
PWM duty 0-255 on D0/D1. |
Analog output control
| Tool | Purpose | |
|---|---|---|
set_analog_output_mode |
A0/A1 mode (tri-state, fixed voltages, custom DC, waveforms on A1). | |
set_analog_dc_level |
Custom DC voltage for A0/A1 when mode = 6. | |
set_a1_waveform |
A1 ramp/sine/square/triangle min, max, step count. |
Cursor control
| Tool | Purpose | |
|---|---|---|
set_cursor |
Move the current, x1, or x2 cursor to a time (seconds). | |
get_cursor |
Return current, x1, or x2 cursor time. |
Post-capture pipeline
| Tool | Purpose | |
|---|---|---|
apply_changes |
Re-run Custom Decoders, PacketPresenters, then trigger search. Blocks until done or until the GUI Cancel is clicked. | |
is_processing |
Non-blocking check of pipeline state. | |
cancel_processing |
Request cancellation of the running pipeline. |
Trigger status and navigation
| Tool | Purpose | |
|---|---|---|
is_triggered |
YES if any triggers fired. | |
get_trigger_count |
Total triggers detected. | |
get_trigger_index |
1-based index of the currently viewed trigger. | |
get_trigger_cursor |
Trigger cursor position in seconds. | |
set_trigger_cursor |
Move the trigger cursor to a time. | |
next_trigger, prev_trigger |
Step the trigger cursor. | |
first_trigger, last_trigger |
Jump to the oldest or most recent trigger. | |
goto_trigger |
Jump to trigger N by 1-based absolute index. | |
center_trigger |
Re-center the current trigger in the waveform. | |
reprocess_triggers |
Re-scan with current trigger settings only (legacy, prefer apply_changes). |
Trigger configuration
| Tool | Purpose | |
|---|---|---|
set_trigger_mode, get_trigger_mode |
off / normal / auto. | |
set_trigger_source_type, get_trigger_source_type |
none, analog, digital, atext, avalues, ..., dppgraph. | |
set_trigger_channel, get_trigger_channel, get_trigger_channel_list |
Pick the channel within the current source. | |
set_trigger_condition, get_trigger_condition |
rising / falling / pulsehighgreater / pulsehighless / pulselowgreater / pulselowless / contains / equals. | |
set_trigger_threshold, get_trigger_threshold |
Analog / Device-Values threshold value. | |
set_trigger_pulse_width, get_trigger_pulse_width |
Value plus unit (ns/us/ms/s). | |
set_trigger_text, get_trigger_text |
Pattern for contains / equals. |
Buffer and pre / post-trigger
| Tool | Purpose | |
|---|---|---|
set_buffer_size, get_buffer_size |
Capture buffer size in MB. | |
set_pre_trigger_mode, get_pre_trigger_mode |
keepall / keeplast. | |
set_pre_trigger_seconds, get_pre_trigger_seconds |
Keep-last window depth (1-60 s). | |
set_post_trigger_mode, get_post_trigger_mode |
untilfull / stopafterseconds / stopaftertriggers. | |
set_post_trigger_seconds, get_post_trigger_seconds |
Seconds to keep capturing after first trigger. | |
set_post_trigger_triggers, get_post_trigger_triggers |
Number of triggers to capture before stopping. |
Input channel settings
| Tool | Purpose | |
|---|---|---|
logic_channel_on_off |
Enable / disable a logic channel D0-D7. | |
analog_channel_on_off |
Enable / disable an analog channel CH1-CH8. | |
set_device_mode |
Set a device port (A-D) decoder mode by decoder index. | |
set_threshold_level |
Digital logic threshold (1.0, 1.8, 2.5, 3.3, 5.0 V). | |
set_label |
Set the display label for a logic, analog, or device entity. | |
set_device_setting |
Set the numeric setting (baud, bit rate) for a device port. |
View and navigation
| Tool | Purpose | |
|---|---|---|
zoom_all |
Fit the whole capture on screen. | |
zoom_from |
Zoom to a time range. | |
search |
Search forward for text in decoded ADP data. |
Panels and display
| Tool | Purpose | |
|---|---|---|
show_tab |
Open a tab: inputs, triggers, outputs, list, settings, notes, code, liveui, devices, close. | |
set_device_visibility |
Show / hide a device's rows in the waveform. | |
set_theme |
Switch dark or light mode. |
Notes
| Tool | Purpose | |
|---|---|---|
clear_note |
Wipe the Notes editor. | |
append_note |
Append text. | |
get_note |
Read the full Notes content. |
AI Snapshot Analysis Context
| Tool | Purpose | |
|---|---|---|
clear_analysis_context |
Wipe the Analysis Context. | |
append_analysis_context |
Add a line to the context block written into AI Snapshot exports. | |
get_analysis_context |
Read the current Analysis Context. |
File operations
| Tool | Purpose | |
|---|---|---|
open_capture, save_capture |
.active capture file load / save. |
|
save_between_cursors |
Save the X1-X2 range to a new .active file. |
|
open_configuration, save_configuration |
Configuration .ini load / save. |
|
export_between_cursors |
Export decoded data as CSV. | |
export_ai_snapshot |
Export the X1-X2 range as a .aft AI Snapshot. |
|
save_screenshot |
Save a PNG of the full application window. |
Application
| Tool | Purpose | |
|---|---|---|
exit_app |
Close the application. | |
send_raw_command |
Pass-through to the TCP API, for anything not covered by the typed tools. |
Custom Decoders are configured via the GUI, not the MCP server. There are no MCP tools to attach a Custom Decoder, set its parameters, or edit its script. The intended workflow is to set up your decoders (and channel labels, units, triggers, etc.) interactively in the GUI, save a configuration with
save_configuration, then in scripts callopen_configuration <path>to apply it, followed byapply_changesto rerun the pipeline if a capture is already loaded. See the Custom Decoders chapter for the GUI-side setup and the recommended save / restore workflow.
macOS Differences
The steps above are written for Windows. On macOS the differences are:
Python: Open Terminal and type python3 --version. If it prints 3.10 or above, you are set. Otherwise download from python.org.
Install the dependency:
pip3 install mcpServer file location: Extract to somewhere like /Users/yourname/ActivePro/mcp/ - use forward slashes.
Config file location:
~/Library/Application Support/Claude/claude_desktop_config.jsonTo open that folder in Finder: press Cmd+Shift+G, paste the path above, press Enter.
Config file content on Mac - use python3 and forward slashes:
{
    "mcpServers": {
    "active-pro": {
    "command": "python3",
    "args": [
    "/Users/yourname/ActivePro/mcp/server.py"
    ]
    }
    }
}
Use whichever command (python or python3) works in your Terminal.
Troubleshooting
The hammer icon does not appear after restarting Claude Desktop
Work through these checks in order:
1. Verify the JSON is valid.
Open claude_desktop_config.json in a text editor and look for: mismatched braces, missing commas between entries, a trailing comma after the last entry, or unmatched quotes. A single character mistake silently prevents the config from loading.
To check automatically: copy the entire file contents and paste into an online JSON validator such as jsonlint.com. It highlights errors with the line number.
2. Verify the path to server.py is correct. Open Command Prompt and type exactly what you have in the config (as a single command):
python C:\ActivePro\mcp\server.pyIf you see No such file or directory or any path error, the path in your config is wrong. Find the actual location of server.py and update the config.
3. Verify Python is on your PATH.
Type python --version in Command Prompt. If it fails, Python is not accessible to Claude Desktop. Reinstall Python and check "Add to PATH."
4. Confirm Claude Desktop was fully quit and restarted. On Windows, closing the window often leaves Claude in the system tray. Right-click the system tray icon and choose Quit, then relaunch.
5. Read the Claude Desktop logs. Claude Desktop writes MCP error details to log files:
- Windows:
%APPDATA%\Claude\logs\ - macOS:
~/Library/Logs/Claude/
Open the most recent log file and search for active-pro or error. The message will usually pinpoint the problem.
"Cannot connect to Active-Pro on port 37800"
The Active-Pro application is not running, or the installed version is below 3.8. Start the Active-Pro application first, then ask Claude to try again.
Commands time out
The default timeout is 15 seconds. stop_capture on very long captures with heavy decoding (especially with several Custom Decoders attached) can take longer, this is expected. The server waits for the Active-Pro application to finish processing before returning. If timeouts happen consistently, try shorter capture durations or reducing the number of active channels.
Claude says it doesn't have any Active-Pro tools
You are either using the browser version at claude.ai (which does not support local MCP servers), or Claude Desktop did not successfully load the config. Confirm the hammer icon appears in Claude Desktop's chat input bar, and that you started a new conversation after restarting.
pip install mcp fails
Try:
python -m pip install mcpOn macOS:
pip3 install mcpOn Windows, if you see a permissions error, open Command Prompt as Administrator and try again.
Quick-Start Checklist
Use this before asking Claude to control the Active-Pro for the first time:
- Claude Desktop installed from claude.com/download and signed in
- Python 3.10 or above installed,
python --versionworks in Command Prompt -
pip install mcpcompleted without errors -
server.pyextracted to a permanent folder (e.g.C:\ActivePro\mcp\) -
claude_desktop_config.jsonsaved with correct path and double backslashes - Claude Desktop fully quit (not just window closed) and relaunched
- Hammer icon (🔨) visible in the Claude Desktop chat input bar
- Active-Pro application running (version 3.8 or above; 6.x for trigger commands)
- Hardware device connected (if doing captures)
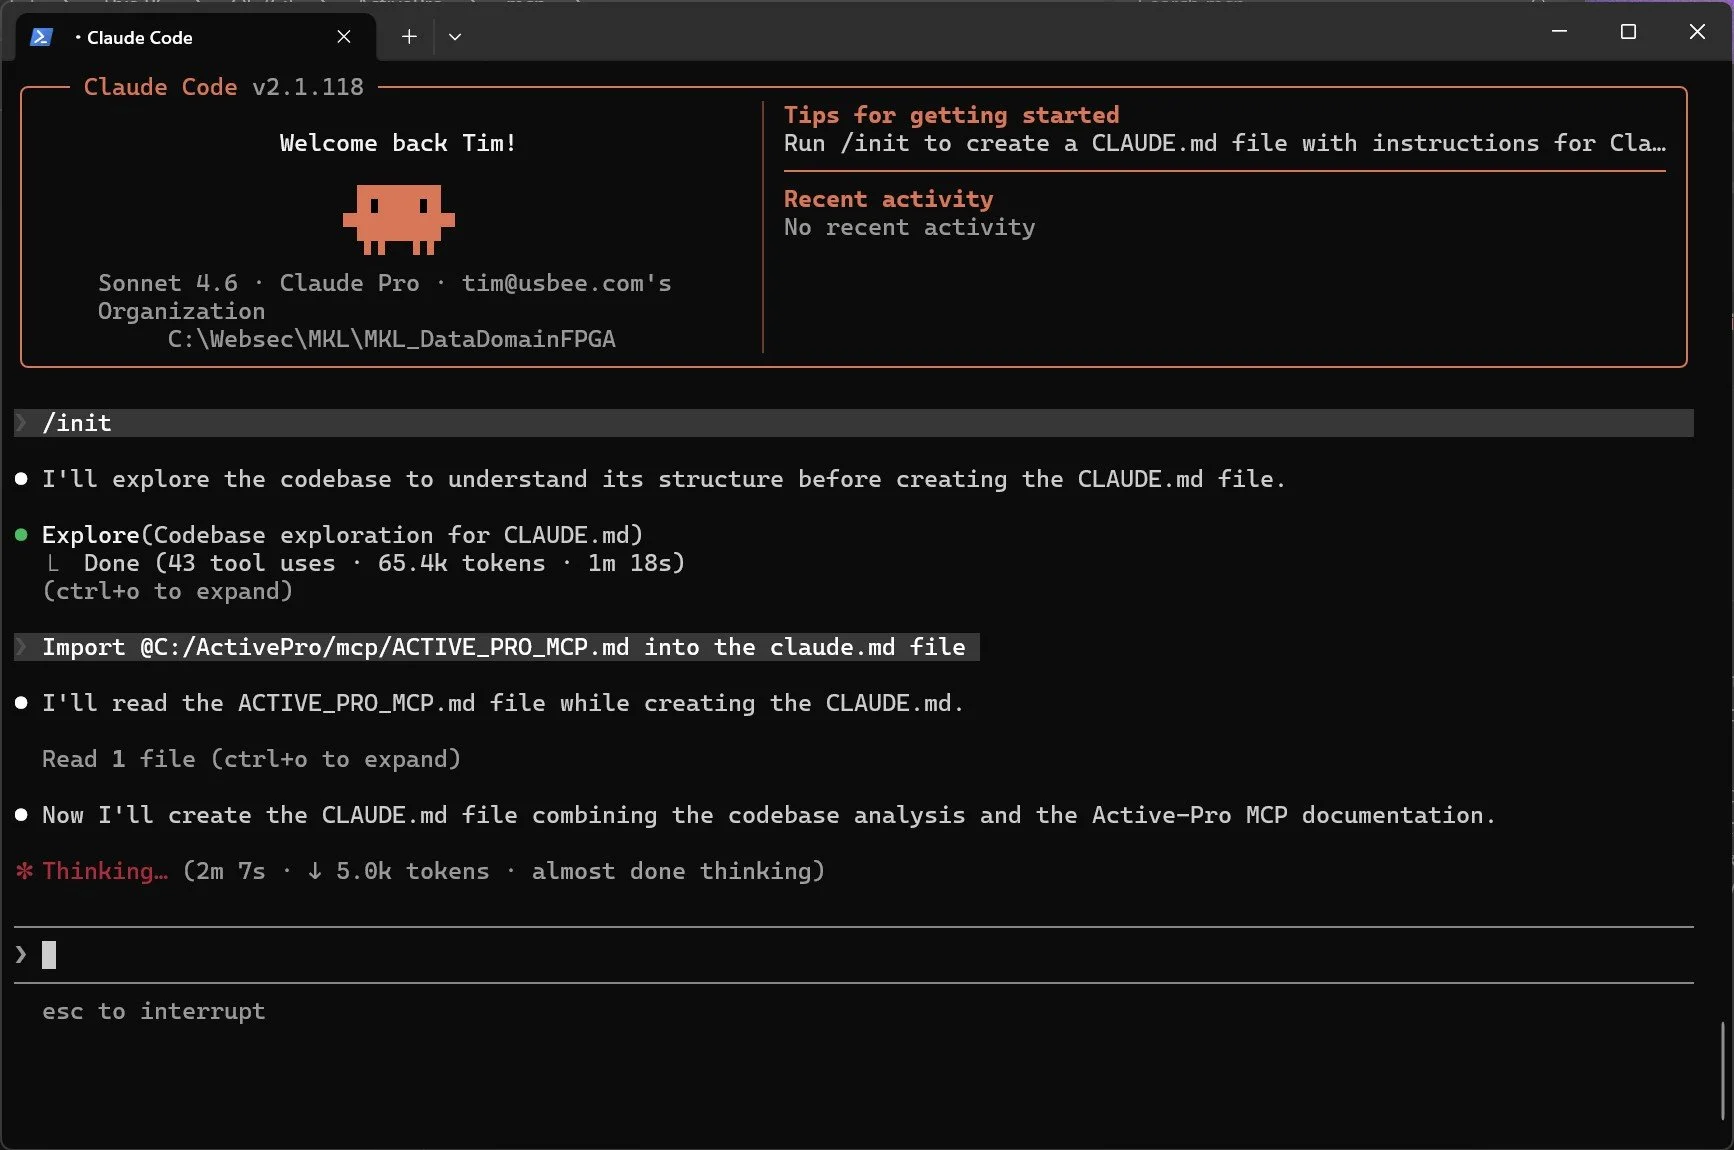
Import the included ACTIVE_PRO_MCP.md file into the tools base instruction file
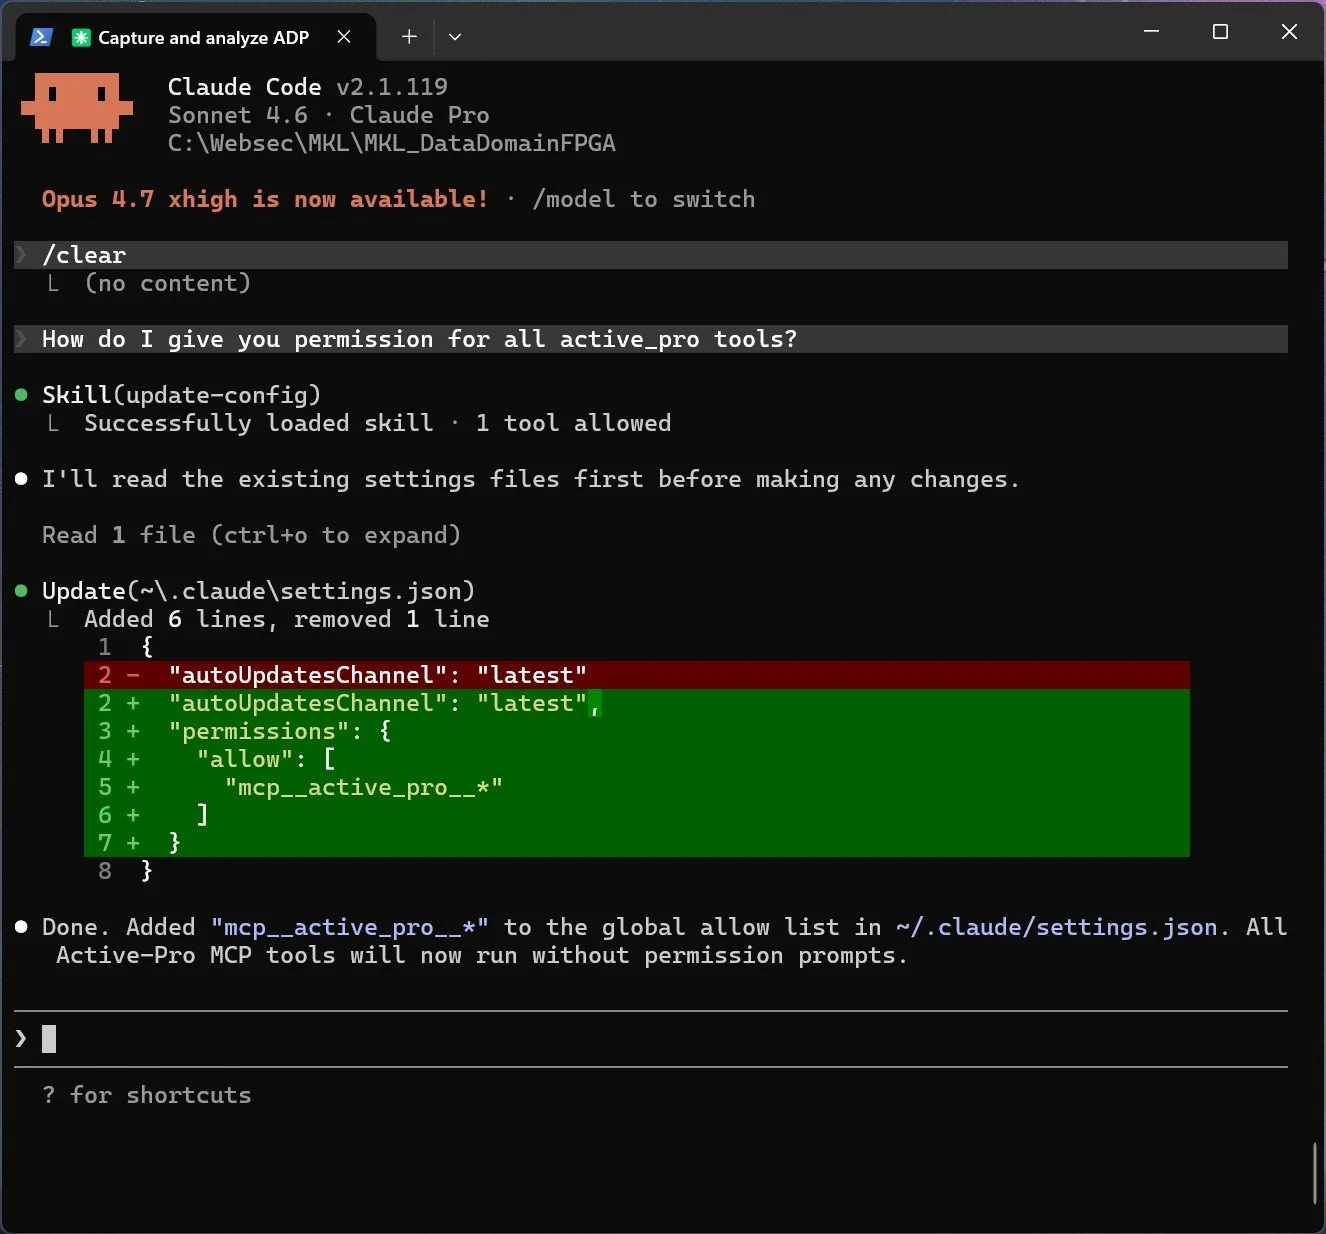
Telling Claude to allow the Active Pro commands (otherwise you’ll be prompted the first time you use any of them)